Building a wine cellar, in the opinion of the vast majority of ardent wine collectors, both amateur and professional, is crucial for keeping the wine from going bad and for maintaining the wine’s quality, integrity, and flavor. If you install a wine cellar in your house, you’ll have the ability to preserve your wine collection in complete seclusion while ensuring that the humidity and temperature remain stable.
No matter how large or tiny the wine cellar may be, the best method to keep wine is in a wine cellar that has been constructed with care. It’s possible to create a wine cellar in your house by remodeling an existing closet or other unused room, or by finishing off your basement. Because constructing a wine cellar is not nearly as challenging as it may first seem, many people who are passionate about wine choose to do it on their own.
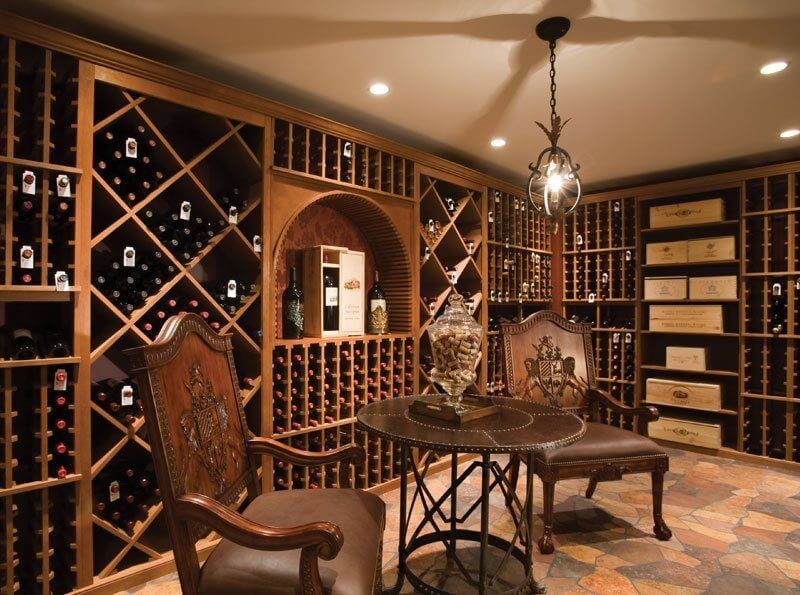
Your wine cellar will not only serve as a location to store and safeguard your wine, but it will also develop into an essential area in your house that reflects your own taste and makes a statement about who you are. By constructing a wine cellar in your home, you will not only be able to safeguard your investment (your collection of wines), but you will also be able to add a magnificent room to your property that is designed for hosting gatherings.
The ideal option is to construct your own wine cellar in your basement or in any other empty area in your home if you have the room to do so. This will make the wine cellar a more unique and enjoyable environment to spend time in with friends and family.
It may not be possible to construct a wine cellar due to a lack of available space; nevertheless, installing a wine rack in the basement, under the stairway, or in any other location will provide you with an excellent alternative. I’ve put up a short course on how to build a wine cellar that’s completely free of charge and will teach you all you need to know to create a stunning wine cellar in your own house. I will instruct you on everything, from selecting the most appropriate location in which to construct a wine cellar in your house to constructing racks to determining the optimal levels of humidity and temperature for storing your wine. Try out this free short course if you’re passionate about wine and want to learn more about the beverage.
It is a wise investment to construct a wine cellar in your house since doing so will enable your wines to mature and develop additional layers of complexity as the producer had planned.
Quick Navigation
Step 1: Location of the Wine Cellar
The question “Could I place a wine cellar just about anywhere in the house?” is the one that is asked the most often. The answer to this question is true, but the location that you choose will have a long-term effect on the amount of money that it will cost to maintain your basement. The area of your home that has the lowest temperature and highest relative humidity is the ideal location for a wine cellar. The closer you go to the temperature range of 55°-58° F and the 55-75 percent humidity that your wine will need, the smaller of an air conditioning unit you will need, and the lower the overall cost will be. The calculations for the amount of heat gain that will be done for your wine cellar will take into consideration the environment that will have an effect on the wine cellar. If the natural environment around you has a consistent annual heat range of 85 degrees, as opposed to an average temperature of 65 degrees, then you will need to invest in more powerful air conditioning equipment in order to maintain the desired temperature within the building. A dry environment will also need a greater amount of humidity to be released on a more regular basis.
Step 2: Installing Studs
In the event that this is a brand new building, you will need to stud the space in order to frame out your wine cellar. Before beginning to install the studs, you should begin by sealing the concrete foundation walls. (Stop: Before moving on, have a look at Step 4 now; if you want to utilize the 6-millimeter steam barrier with the new structure, you have to install it while the studding is being done. If you want to use spray foam, then you should proceed with the next step as described.) Then you should create it using either 2x4s or 2x6s. When you want to boost the insulation value as a means to lower the size of the cooling unit and the amount of energy that you use, the 2×6 structure is the one that you should choose. This is analogous to installing more heat insulation in your home in an attempt to reduce the amount of money you spend on energy bills every month. Once you have started the process of constructing your wine cellar, it is imperative that you secure the necessary permits and ensure that your work complies with all applicable municipal, state, and national building laws.
Step 3: Soffits
It is essential to keep in mind that the illumination that is mounted in the soffit needs to be spaced far enough apart so that it does not interfere with the finished racking depth and/or ducting depth, similar to the depth of crown molding if you build a soffit to cover ducting, piping, or other items that are in the way. If you do this, the finished racking and/or ducting depth will be unaffected. You need to make sure that you are able to make it possible for the dimensions of the ring on the light fixture after you have inquired about the ultimate range of the shelving, which should include the crown molding in this region. As a general rule, you should allow a space of one inch between the front side of the crown molding and the edge of the ring on the can light that is closest to you. In addition to this, you need to ensure that you are using IC can lights so that you may properly insulate everything around them.
Step 4: Installing and opening a self-contained air conditioning unit
In the event that you have plans to install a self-contained air conditioning unit, you will be required to cut a hole in the wall that is of an appropriate size for the unit. You will also need to install an electrical outlet in the vicinity of the area; depending on the type of apparatus that you want to purchase, this outlet will either need to be located on the inside or the outside of the housing for the device. As a result of the fact that some of these types need a drain line as well, you will need to make room in your design for a condensate drain. Because these devices do not have the capacity to provide moisture to a wine cellar, you may need to provide a 110V electric outlet in the wine cellar in order to use a humidifier.
Step 5: Select Your Insulation & Vapor Barrier
Insulating a wine cellar against heat and providing it with a vapor barrier may be accomplished in a few different ways. Spray foam, a vapor barrier with a thickness of 6 mil, or fiberglass batts. Spray foam is typically more expensive, but it eliminates the risk of a leak mark being left in your vapor barrier (since a 6 mil vapor barrier is not required when applying spray foam) that could have been caused by someone working on the exterior of the house and putting screws, running wire, pipes, or other items into or throughout the wall structure. This could have happened if a vapor barrier had been present. In any method, you must check to see that there are no spaces for air to get through between the insulation and the drywall.
Step 6: Vapor Barrier for New Construction
Before lifting the wall studs into position, it is recommended that you first install a vapor barrier with a thickness of 6 mil on the reverse side of the wall studs if the building in question is brand new and you do not intend to utilize spray foam. You must cover your ceiling joists. In some parts of the country, the local building code requires that all vapor barriers be installed on the warm side of the basement. In some areas, we strongly recommend that you choose spray foam insulation instead.
Step 7: Wrapping the Walls & Filling Holes
Be careful to leave some extra vapor barrier at the corners of the container so that you may wrap it, overlap the seams, then tuck tape (not duct tape) to seal it. Then, using a fire-rated penetration sealant, plug up all of the gaps in the studs and joists to reduce the amount of air movement. This product is sold by the firm that goes by the name Tuck Tape UV tolerant adhesive. We are only providing you with an example of a solution in order for you to have a better understanding of what it is that you are looking for.
Step 8: Insulation & Vapor barrier for the Wine Cellar
If this is a task that involves remodeling, it is acceptable to wrap the pre-existing studs in the area in a manner that is analogous to how the ceiling joists are wrapped. Be certain that the vapor barrier will be installed on the warm side of the wine cellar, which is the wall that faces the outside of the cellar.
Step 9: Insulation & Vapor barrier for the Wine Cellar
After the vapor barrier has been installed, the stud and joist cavities should have thermal insulation placed inside of them. Batts made of fiberglass are the most common kind of insulation utilized. If you use fiberglass to insulate a wall cavity that is 2 by 4, you will end up with an R-13 rating. An R-19 insulation rating may be achieved using fiberglass in a wall that is 2 by 6. To prevent any pockets of air from forming inside the hollow, the whole space must be “fluffed” with insulation.
Step 10: Electrical Outlet Placement in the Wine Cellar
The greatest locations for outlets in a wine cellar are the empty areas at the sides where the racks join together. If you place the outlet in a different position, there is a good chance that it will be obstructed by one of the poles that support the wine rack. Any recommendations that were made for the placement of outlets in your wine cellar will be rendered null and void if you fail to comply with the local building code for outlet positioning. This is an extremely important requirement.
Step 11: Outlet Placement for High Reveals with Lighting
To be able to plug in your lights, it is not necessary to install an electrical outlet in the spot where a higher reveal rack will be situated. This is because it is not necessary to do so. The length of the wire allows it to travel a distance of up to 6 feet in order to reach the outlet that is located in the dead area. If you decide to have the outlet placed in this location since it is more convenient for you, you will need to instruct your design consultant to put the outlets in the appropriate places when they complete the plan for the outlet placement for you. It is recommended that switches be installed for outlets that will be used for high reveals and another accent lighting, such as lighting for archways.
Step 12: Wall Coverings
The next phase, which will be to protect the walls and ceiling, will be taken after you have installed the studs, the vapor barrier, the heat insulation, and the electrical outlets. You should choose materials that are resistant to the high humidity conditions that will be present in your wine cellar, and based on those characteristics, water-resistant drywall is the most common alternative for wall structures and ceiling coverings (typically known as green boards). As a result of the fact that this drywall is identical to the kind that is installed in the bathrooms and kitchens of the majority of homes, it is really simple to get. It is strongly recommended that the green board is directly fastened into the ceiling and walls of your wine cellar. Seal any penetrations on both the inside and outside of the wine cellar with a fire-resistant sealer designed for that purpose.
Step 13: Finishing the Drywall
Because the base molding will be attached to the front of the racking, it is essential that you run the drywall all the way to the floor and do not allow any gaps in the installation. To ensure that the back of the rack is always flat with the wall, there should be no molding attached to the wall in any way.
Step 14: Painting the Drywall
After you have primed the drywall with a high-quality product, proceed to paint the outside using an exterior paint that is water-based. If you do not allow enough fresh air into the space, paints that are oil or solvent-based may cause an unpleasant stench in the wine cellar. Make sure the drywall is painted all the way down to the floor by the painters you hire. In most cases, they will stop an inch or two short of the flooring since they are aware that this area will be covered with base molding. Because your molding will be located on the front of the racks, there may be an ugly gap visible if they do not run the paint all the way down to the base of the racks.
Covering Options for the Walls and the Ceiling
Applying tongue-and-groove paneling to your walls and ceiling with a finish, stain, or lacquer that is identical to the kind of wood that will be used for your shelving is one option for achieving an attractive decorative effect. Before you install your tongue and groove, it is recommended that you first screw marine-grade plywood with a thickness of 34 inches into your ceiling and walls.
Step 15: Flooring
When installing flooring in a wine cellar, you need to be sure that the flooring you chose can withstand the high levels of humidity that are present in the environment. Because of this, you should steer clear of carpets for a variety of reasons, one of which is the possibility that they may rot. You should also avoid utilizing vinyl flooring since the mastic that is below it will remain damp, and the floors may have a propensity to slide and buckle as a result. If you seal the concrete well, you can use it as a floor, even if it is bare concrete. It is common practice to use tiles made of porcelain or ceramic, cork, or genuine wood for flooring if you want a solution that is more aesthetically pleasing. When installing wood flooring, it is recommended that you leave a space of half an inch all the way around the edge to allow for expansion. The amount of expansion that takes place may be minimized by allowing the wood to acclimate to the conditions of the wine cellar for at least forty-eight hours if time permits.
Step 16: Alternate Ceiling
You have the option of installing a raised panel ceiling and/or soffit in addition, to making use of tongue and groove surfaces for your ceiling. Although this will not have a significant impact on the insulation value of your wine cellar, it will have a significant impact on the overall visual appeal of the space. It doesn’t matter whether the space is arranged in a rectangle, square, octagon, or round—raised panel ceilings may be designed to fit any of these configurations.
Step 17: Installing a Wine Cellar Door
Installing an exterior-grade door that is sealed on three sides with weather-stripping and on the bottom with a threshold and door sweep is going to be necessary for you to undertake. A door that leads inside cannot be used in this manner at all. You want to maintain an environment with temperatures between 55 and 58 degrees Fahrenheit and humidity levels between 55 and 75 percent. As a result, you need a barrier between that room and the other rooms in your house, which typically have temperatures closer to 70 degrees and humidity levels closer to 20 percent in most of the United States. If you use a door made of glass, you will need to have it thermopane so that it has insulating capabilities and so that condensation does not form on the glass owing to the temperature difference between the inside and the outside of the building. You also have the option of using doors made of solid wood if you want.
Step 18: Lighting
When it comes to the many options available for lighting in a wine cellar, there aren’t too many limitations. In the event that you want to install can lighting in a wine cellar, you will need to make use of thermally fused can lights, which are also referred to as IC-rated cans. In any instance, you will need to employ IC-rated cans. There are already a number of concerns about the potentially harmful impact that UV lamps have on long-term preservation. Although there is not yet any scientific evidence that can verify this, there is consensus among professionals in the field that you should steer clear of UV illumination.